
“Cold” flaring is quite simple one-step process that doesn’t require any softening stage. The larger diameter of the tube the thicker tubing wall (typically) which makes the flaring process more difficult.
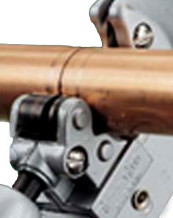 1. Cut the tube section to needed length and deburr the end. Cut the line properly, a tubing cutter is your best friend. The cut needs to be square to the tube, get this wrong and you will never get a good double flair.
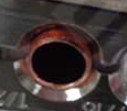
2. Deburr it. If you will not deburr, the burr will interfere with making a proper flare, either by breaking off and getting burnished into the wall of the flare, or by making the outer edge of the flare to thin.
 3. Clamp the tube tightly. The end being flair should stick out on the side of the clamp that has the holes with beveled edges so you have to get the tube so it is sticking out the proper distance.
3. Take the die with corresponding tube size and place it flat on the clamp next to the tube. Looking at the side of die you will see a band in the casting. The tube end should stick out of the clamp the same distance as the depth of the band on the die. Get this lined up and then tighten the clamp. Tighten the wing nuts on the clamp.
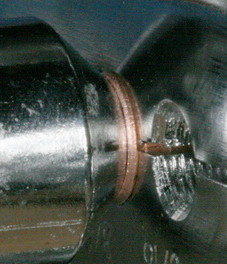 4. Flit the die over and place the stub end in the tube. Place the press over it engaging it with the clamp and tighten the press until the die is in contact with the clamp. When you feel the tool want to stop turning, stop trying to turn it, and back it off. If you continue cranking down on the tool after it is finished flaring the tubing out, the lobes of the flaring cone mashing against the copper will leave an impression in the wall of the flare that will cause a leak.
5. Loosen the clamp and remove the die.