Footnotes on Car Brakes

Brakes are the most important feature on a car. One has to be very careful with the proper maintenance of these and should always keep a proper track of their condition. You will be at great risk if any of the brakes on your car is worn out. And even if you find a minor problem with the brakes, don’t take it lightly as it requires immediate attention from an experience mechanic. A seemingly minute problem could lead to brake failure risking not only your life but also the life of others.

Sometimes, diagnosing car brake problems is quite simple though complete brake repair is slightly more complex. Here are a few guidelines to help you identify brake related problems:

The first and foremost thing to do is to check on the brake fluid. It should not be lower than the ‘Min’ mark on the brake fluid container. In case it does appear to be lower than the minimum required level, check for brake fluid leakage. It could also mean that the brake pads could be worn out and they need to be replaced immediately. Low brake fluid is also indicated in the instrument panel of the car by the glowing of the brake warning light.

Nowadays, most of the cars are enhanced with Anti-Lock Braking System (ABS) Technology. If the ABS brakelights (if present on the car) are ON, it indicates a problem with the ABS system and the on-board computer in the car will disengage the ABS automatically.

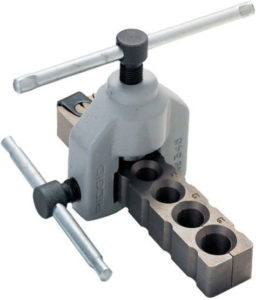
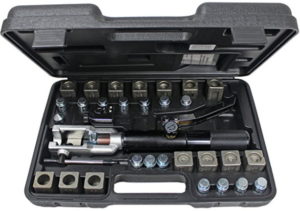
Do you live in a place where road salt widely used? If so, your brake lines might be rusty, so you should replace them (with using of brake line flaring tool) to avoid things like death, despair and turmoil.

Due to bad disc calipers, wheel bearing problems, loose or broken brake pads, or contamination of the brake pads, the car might skid or the wheels might get locked. Such faults in the brake system are of a very serious order and should be rectified immediately.

Sometimes, brakes turn really hard which is caused due poor power brake boosters or failed caliper components and this problem can be fixed by checking the brake pedals. Incase of further problems, you need to show your car to the mechanic.

There are times when you car is pulled to the right or left on braking. This is because of bad or worn out brake pads. During you drive, sometimes, you could sense a smell of burning rubber. Check on this problem immediately as it could be from some very important component of the car’s braking system.

At times you could hear a grinding noise appearing to be generated at the wheels of your car. This is usually due to the accumulation of dirt and mud within the brake system. The fastest solution to this is to have the brake rotor replaced entirely.

If your car starts vibrating when brakes are applied, this indicates overheated brake components or over-tightened lug nuts.

A little care can save you a lot of trouble and on the slightest indication of a fault in the car’s system, it is always better to take it to an authorized service centre and get it rectified as soon as possible.

Brake Line Repair

Often times, the brake line can be broken or worn out, which needs a repair. Usually, the elastic hoses in front of the wheel are often changed than the rear taut lines. If these problems occur you must repair it immediately. There is no assurance that your driving is safe if your brake line is damaged. Proper attention is required I your regular car maintenance. Get a brand new brake hose in your trusted auto supply stores before you start to repair the brake line on the front wheels of the vehicle (you can also use brake line flaring tool to prepare your metal tubing for replace). Lift the wheel and place jack stand beneath the car to ensure safety and carefully remove the wheel to have an easy access. Typically, there is a bracket or sliding clip molded to the upper support arm that steadily holds the brake line.

Remove the screw of the rake line from the tip of the rigid brake line, and then remove the screw in front of the caliper. In between the caliper and line is a gasket which is usually made up of copper. In changing brake line, new gasket is suggested. Set up the line and make sure not to cross thread the fittings. When you already installed the line and bracket was reattached, loosen to bleed screw on top of the caliper. Air and brake fluid should start to leak out. Fill up the master cylinder with new fluid; return the cap before closing the screw on the caliper. Ask for an assistance to check the brakes. Let someone pump the brake pedal several times and hold. Slightly loosen the screw and you can observe that fluid spurt out. The fluid is harmful when it enters your eye that is why you should wear protective goggles or glasses. In transferring fluid into a container use a small hose.

When the screw is loosened, the brake pedal will touch the floor. Tighten the screw and ask your assistant to pump the brakes again. Continue pumping until you observe that there is no air coming out from the screw when you loosen it and reinstall the wheel. Check all four wheels and make sure that there is no air entered into the system when you turned the brake line off. Before drive testing, make sure that your brake is in good condition. If it does not function properly, check them again that air is not present in the system and check the level of the fluid. The brake system has several parts that must be operated together for the system to work properly. If one part is malfunctioning, the driver may not easily stop the car that is why brake line repair is important.

RIDGID 23332 345 Flaring Tool for 45-degree flares


The tool makes 45-degree flares in soft metal tubing with a hardened smooth flaring cone, provides either single or double lap. Supports SAE flares in 3/16-inch, 1/4-inch, 5/16-inch, 3/8-inch, 7/16-inch, 1/2-inch, and 5/8-inch sizes
Covered by lifetime RIDGID warranty against defects in material or workmanship for the life of the tool.

Cons

This model does not include the adapter buttons. I bought 3/16 adapter for about $10, so the total cost was about $56.00. I still think this is a good tool for the money.

The side of the yoke where the flaring block rests is slightly stepped. So, there’s not so easy for me to get the flaring block perfectly centered below the flaring cone.

Pros

The tool grips the tubing well and has long and sturdy handles for smooth, sure flares. Ridgid makes industrial duty tools which should last for generations.

I think, it is great combination of a cost, reviews, and the Ridgid brand reputation. The tool is solid, heavy, and well constructed. It makes good double flares on copper-nickle brake lines. The holes are smooth, but hold the tube tight.

Flare tools around $30 and less are all junk. Before you waste your money,  rent a cheap tool. You will see what I mean by junk. Next price range seems to be $100 with the adapters included, but Ridgid also includes tube cutter, which I have. I probably never will need another adapter, so this was a good deal for me.

Universal Mastercool Flaring Tool 71475

Mastercool flaring tool 71475-PRC (black) is a universal kit that fabricates flares for GM fuel lines (5/16″, 3/8″); push connect ones (1/4″, 5/16″ 3/8″); metric bubble flares 4.75mm, 6mm, 8mm, 10mm; flare/double flares:(3/16″, 1/4″, 5/16″, 3/8″, 1/2″).

Mastercool Flaring Tool - Black Universal

The kit comes in molded carrying case 15 x 10.3 x 3.2 inches, 11 pounds, 90 days limited warranty.

The Mastercool flaring tool is made to flare brake and AC lines, in there appropriate sizes.  There are dies which will make the bulge in the line for the clips inside the fitting.

I mostly use the tool for making double and bubble flares on brake lines. But it is also capable for a GM fuel line applications.

It has no 37 degree flare, so you need to purchase a separate die set for stainless steel brake lines. The kit also does include the Transmission Cooling Line Die and Adapter Set for GM, but many people would not need this tooling and it keeps the price a little lower. The box has a spare area to hold them. You can purchase them separately.

Mastercool flaring tool is not cheap, but quality tools usually ARE expensive. The cheap $30 parts store flaring tool wasted too much time and tubing because sometimes the flares wouldn’t be offset a bit, cause a leak, leave one side thin, etc. I think, there’s no other tool that will allow you to flare brake lines faster than Mastercool flaring tool. With it, you will be able to do special transmission, fuel, metric, male ends of fuel quick-connect lines, and power steering flares on a bunch of different vehicles.

It takes a little bit of playing with the fittings at first but once you learn how to use the tool and different anvils and flares it works excellent. Very short learning curve, do some testing first before doing the final flare. Be careful while flaring copper alloy tubing, because when you’re doing the second step of a double flare, it’s very easy to over-compress the flare. There’s so much mechanical advantage with the hydraulic ram, it’s easy to over-do it. Once you’ve got the hang of it though, it’s great. Mastercool flaring tool is also good to use to flare lines while a line is mounted to a vehicle.

This set works flawlessly for me every time I use it, definitely recommend it! See also our best flaring tool reviews.